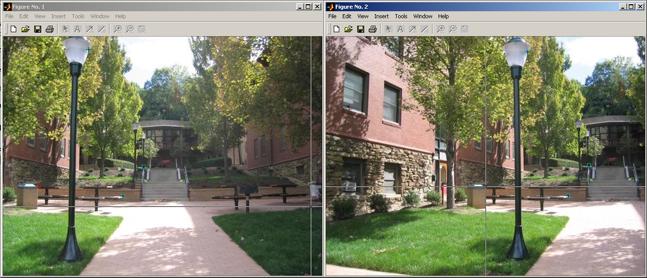
Matt Pucevich, 10/09/04
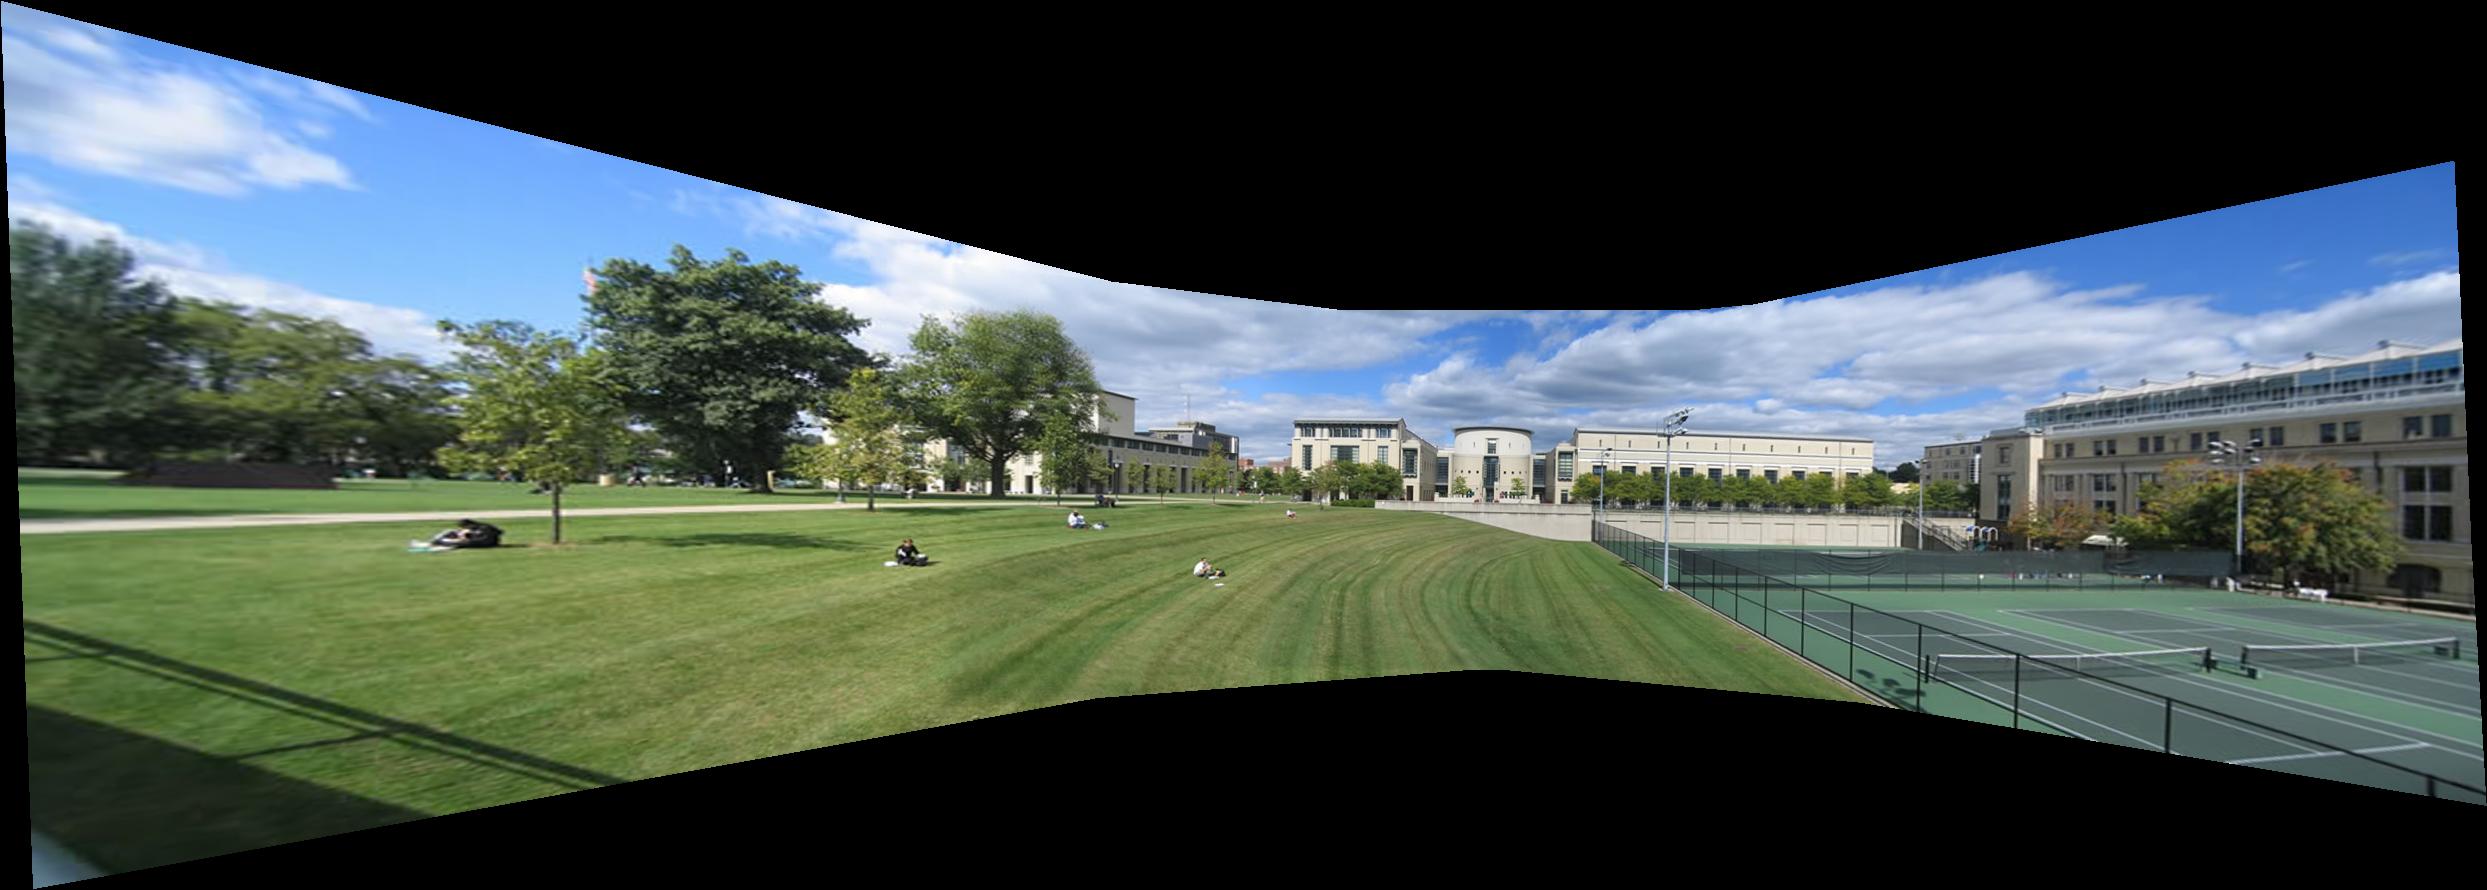
This program is designed to take in a series of component images of a panorama shot and stitch them together (with the help of user-defined correlation points) to form a single image. This image will be saved to a given filename (in jpeg format). The driving function is makeMosaic(imagelist, filename, numcorrpts).
imagelist: A cell array of component images filenames (as character strings) such that every next image in the list borders one of the images before it (essentially so every next image can be tacked on to the existing accumulated panorama).
filename: A character string which is the file name to which the completed mosaic image will be saved
numcorrpts: The number of correlation points to collect for each image. If this number is not at least 4 then the image stitching will not work properly, though using more than 4 will likely improve the quality of results. Using 6 to 8 points should be adequate.
Example: imagelist = {'Boss2ext_C.jpg' 'Boss2ext_L1.jpg' 'Boss2ext_L2.jpg' 'Boss2ext_R1.jpg' 'Boss2ext_R2.jpg' }; makeMosaic(imagelist, 'Boss2ext.jpg', 8)
The process of stitching two images together is broken down into four steps.
Step 1: Aquire correlation points (control points) The first step in the process is to find out exactly how the two images fit together. To do this the user is prompted to define pairs of points on each image which are the same, by clicking a spot on the first image, then clicking on the second image where that same place falls. This process is done until numcorrpts have been defined.
Defining correlation points:
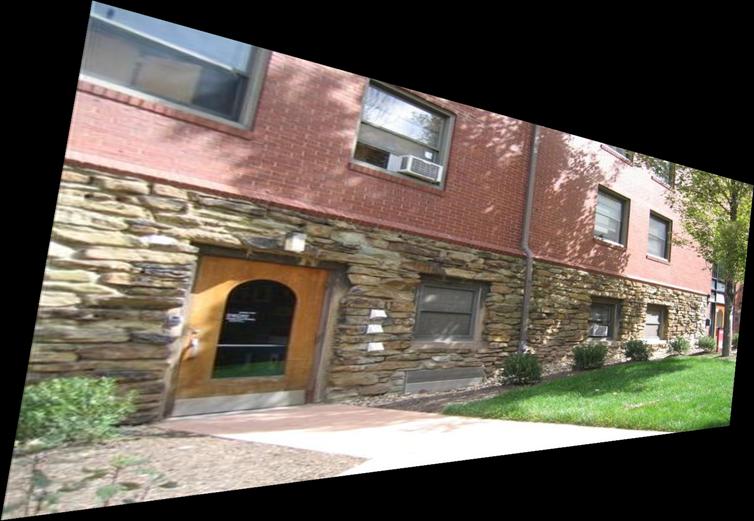
Step 2: Compute the projection matrix (homography) The second step in the process is to compute the projection matrix, or homography, which will project the second image into the perspective plane of the first (or base) image. The computation of this matrix is based upon the pairs of control points that the user defined in step 1, the process of which can be found here in excruciating detail *wink*
Step 3: Warp the second image The third step is to use the homography to warp the second image into the plane of the base image. First a new image is created to hold the warped image. The dimensions of this warped image are obtained by putting the four corner points of the image to be warped (i.e. (1,1) (1,480) (600,480) (480,1) for a 640x480 image) through the homography to find out where they lie, since they will collectively bind the resultant image. The range between the minimum and maximum x and y values that result from the four points' transformation are the dimensions that the warped image will have. Once the boundaries of the warped image have been established, a meshgrid of the x and y coordinates of the warped image (with respect to the base image) are run through interp2 to find the values of all of the pixels post warp, and essentially construct the warped image (interp2 is set to use bicubic interpolation of the base image). This process is done for the R, G, and B channels. Finally, a fourth alpha channel is added. The values of this alpha channel contain a normalized euclidian distance correlation (the distance from any given pixel to the nearest nonvalid pixel). Thus, the warped image is created.
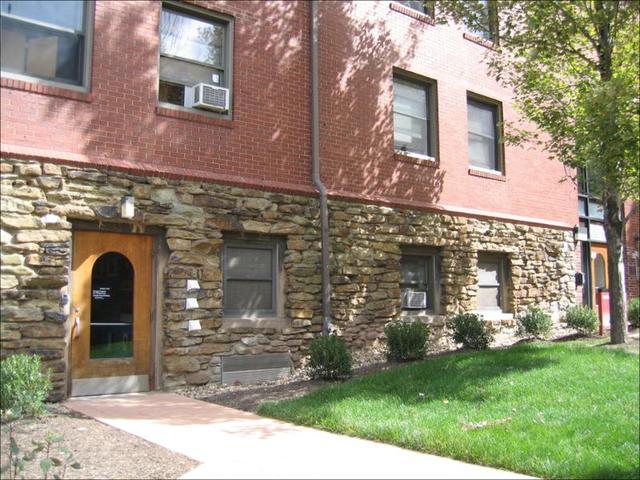
Original form of an image in the series and warped version:
Step 4: Image combination (alignment and blending) The final step is to plop the warped image down onto the base image. The previously recorded boundaries of the warped image (in the base image's coordinate space) are used in this step, along with the boundaries of the base image, to compute the boundaries of the image which will combine them. Once this value is obtained, a new image of appropriate size is created and the warped image and base image contributions (each multiplied by the alpha value of the pixel) are summed and added. The resultant values are all normalized by the sum of the alpha values between the warped and base image, producing a center-weighted alpha blend image, and a black/white mask in the alpha channel for invalid/valid pixels, which is used to re-compute a new distance transform for the combined images' alpha channel. Thus a new base image is created.
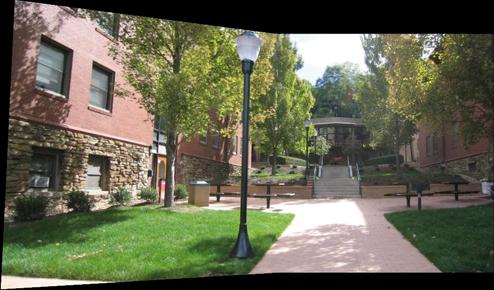
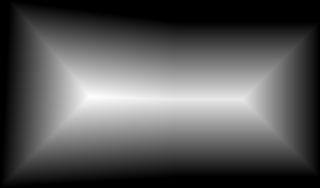
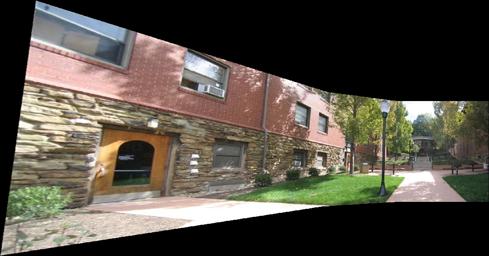
Image "up to this point" (2 are stitched) and associated alpha:
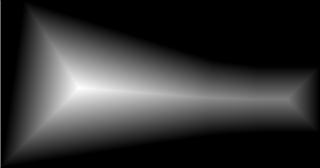
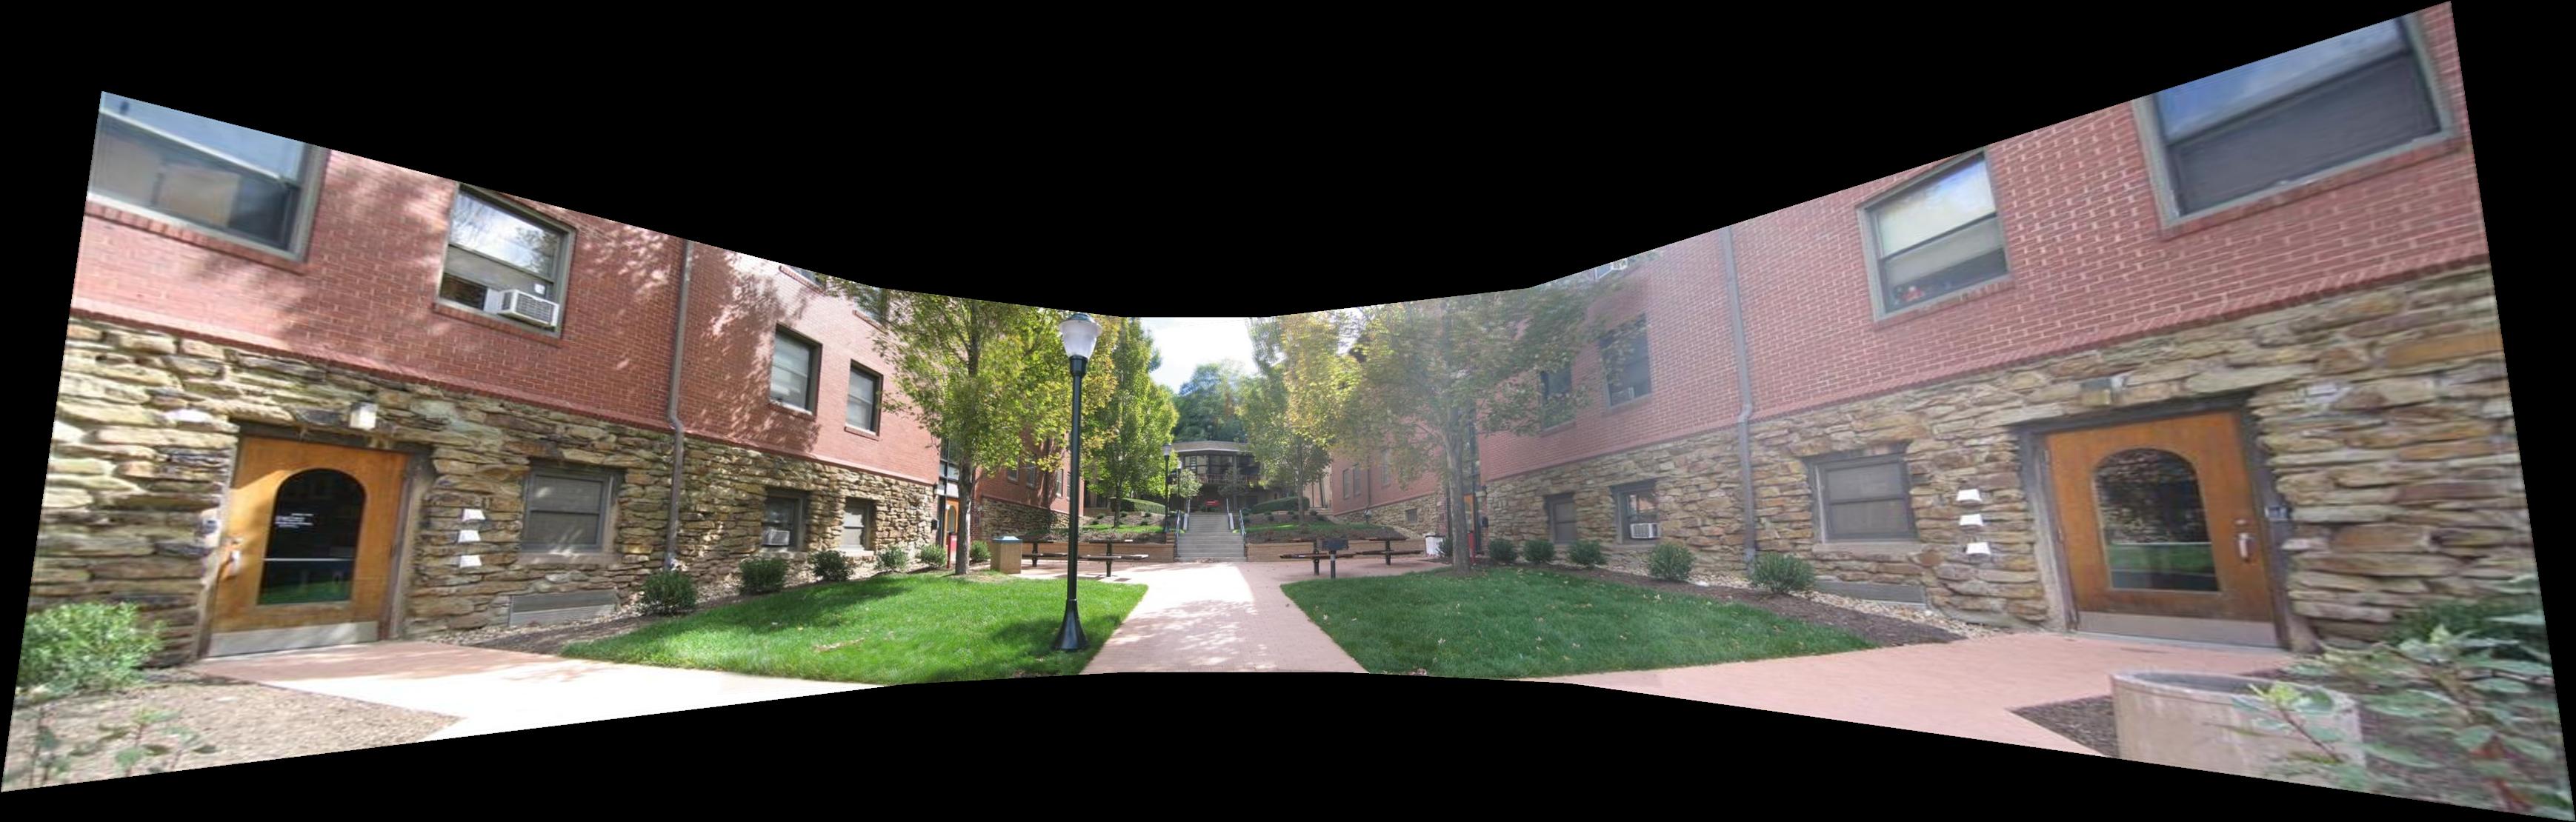
Product after adding warped picture from step 3 and associated alpha:
This process is repeated for every image in the imagelist, each time adding the new base image (the combination of all previous images) to the next image in the list. When all is said and done, a mosaic is written to the given filename and the function finishes.
Day to Night composite mosaic! This mosaic was taken as a day scene, and then as a night scene. The picture below results from stitching the two images together. The unfortunate artifacts near the blend region are unfortunate, though unavoidable without cropping the image.
